Wednesday, November 12, 2008

Vegetable Pizza Revisited

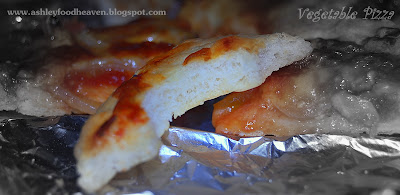
I think I have finally found the perfect pizza dough! I did some substitution to the ingredients on my own and i think I have innovated the dough which turned out amazing! What did I do? I just changed the milk with whipping cream and change the size of the pizza. Everything else followed exactly the same as the vegetable pizza recipe.

The very first difference I noticed was the texture of the dough. It was very elastic. While I was punching out the gas from the dough, it was not sticky at all, very manageable and I did not even need to flour the work surface. I did not expect just by changing the milk to whipping cream can yield me to such results, though I did worry for a while that the dough might be too dry.

Ingredients were modified as the following:

Ingredients:
(yields 1 28 inched pizza)
1/4 cup cold whipping cream
1/4 cup water
1/2 tbs extra-virgin olive oil (I used pure olive oil)
1 1/2 cup bread flour
1 tbs sugar
1 tsp salt
1 tsp dry yeast
Extra olive oil (greasing the baking pan & for the crust before baking)

Toppings:

70 g Pizza sauce (I used pesto sauce)
1/2 Capsicum (Sliced thinly)
4 buttons Shiitake mushroom (Sliced thinly, stem removed)
1/2 head onion (Sliced thinly)
Grated Mozzarella Cheese
Minced garlic


Outcome:

To us, it was superb! I think the pesto sauce and the cream did make the pizza much more appetizing. Again, I received a note of compliment this morning on the kitchen table. I am glad that I took the initiative to change the ingredients and my boyfriend was bold enough to try my lab test. :)

Tuesday, November 11, 2008

Baked Stuffed Mushroom

I have a bunch of leftovers ingredients (shitake mushroom, capsicum & onions) in the refrigerator as I did not manage to finish using them when I made vegetable pizza last week. I thought that I should do something special with them instead of stir frying them.

I decided to bake stuffed mushroom topped with cheese after looking at a blog recommended by my BF (http://foodelicious.blogspot.com/). It is something that I have not attempted before but seemed not too complicated. I just browsed through some of the recipes available online, adapted some of the ingredients and came out with my own version of baked stuffed mushrooms.
As this is only a side dish for our dinner, I just made 6 buttons of mushrooms.


Ingredients:
(yields 6 buttons)

6 buttons Shitake Mushroom
2-3 Shallots (minced)
10 strips Capsicums (cut to small size)
1 tsp Oyster sauce
1 tsp "Shao Hsing" wine
1 tsp olive oil
Grated cheese


Method:

1) Soak the mushrooms for 15 minutes. Cut off the stems, chop stems into small pieces and put aside. Leave the cap uncut.

2) Preheat oven at 180 deg C.

3) Heat up pan with olive oil. For the filling, stir fry the minced shallots, capsicums and stems until fragrant, around 3-5 minutes.

4) Towards the end, add in oyster sauce and Shao Hsing wine and stir fry for another 1 minute. Put the filling aside.

5) Grease the baking pan with olive oil. Place caps at the baking cap and brush with a little olive oil.

6) Put around 1 tablespoon of filling onto each cap and top up with cheese.

7) Put baking pan with the stuffed mushrooms into the oven and bake for 15 to 20 minutes or until cheese slightly browned.


Outcome:

It is yummy! I was urged to take out the mushrooms from the oven earlier as we were already half way through our dinner and it would have become our dessert if we waited any longer. The cheese has melted but both of us agreed that it would have tasted much better if it was baked longer for the cheese to brown. I am very satisfied with the outcome as this is a creation of my own version of baked stuffed mushroom and it turned out rather pleasing!

Saturday, November 8, 2008

Glutinous Rice Ball Soup (Tang Yuan)

Glutinous Rice Ball soup or "Tang Yuan" is traditionally eaten during "Dong Zhi" celebration by Chinese. "Dong Zhi" is celebrated every year following the Chinese lunar calendar and simply means and marks the start of winter season. The round rice balls are a symbol of sweet reunion, harmony and unity within the family.

It is a simple dessert and it can be commonly found in Singapore. Basic "Tang Yuan" consists only rice balls/ dumplings and sweet syrup. I used to eat this type of "Tang Yuan" cooked by my mum when I was young.

Some people might add in different fillings (red bean, sesame, peanut paste & etc) or colouring to the rice balls to make them more appetizing and flavourful. There is even a variety of soup (peanut soup, sesame soup, red bean soup & etc) to go with these rice balls. The combination of these different types of rice balls and soups makes it a more interesting dessert.
A week back, I found a very interesting glutinous rice ball soup recipe whereby the skin is made by swirling the filling in a bowl of glutinous rice flour, layer by layer. Normally, the skin is made by adding to the water to the flour to form a dough. The dough is rolled and then the filling is wrap with the dough skin. Hence, I thought i should give it a try although I find it involves a lot of steps and patience just to make the skin of a single ball.

Other than that, I modified the syrup as I do not have brown sugar and mandarin orange peel at home. I just substituted those with cane sugar and omitting orange peel from my syrup.


Ingredients:
(yields 2 cups, 10 rice balls)

Glutinous rice balls
1 1/2 tbs peanut butter (I used crunchy type)
1 tbs sesame powder
1 tbs icing sugar
1 1/2 tbs roasted sesame seeds
200 g glutinous rice flour

Syrup
1/2 piece ginger (I used 4 slices as I liked more ginger taste in my soup)
75 g brown sugar (I used cane sugar and I reduced the amount to suit my taste)
1/2 piece mandarin orange peel
2 cups water


Method:

1) Mix well of peanut butter, instant sesame powder and icing sugar. Form the mixture into 10 small pieces and roll them into balls.
2) Roll and coat the balls individually with roasted sesame seeds. This is the filling.

3) Chill the filling in the fridge for at least 15 minutes.

4) To form the skin, roll a chilled filling into a bowl of glutinous rice flour. Make sure it is well coated.

5) Dip it into cold water for 1 second and then put it back into the bowl of flour and swirl it in the bowl to coat it with another layer of flour. Repeat this 10 times so that it becomes double the size of the filling. Make sure it does not crack.

6) Boil a pot of water. Once boiling, dump in the rice balls. Boil for another 5 minutes when rice balls are floating.

7) To prepare the syrup, dump in ginger, sugar and mandarin orange peel into 2 cups of water and bring it to boil.

8) To serve, scoop rice balls from water and put into syrup.

Recipe adapted from Chow Times


Outcome:

The filling is not similar to those hot spilling paste filling as normally sold in the stalls. It is solid. Somehow, it is something that I did not expect of. However, the combination of the solid filling and soft skin tasted special and is quite good. The only let down to this was the syrup. It tasted fine when taking it alone, but when combined with the rice balls, it tasted quite bland. It's entirely my fault as I reduced the amount of sugar needed. I will follow the sugar amount as stated above next time. Overall, it is an enjoyable experience and we also enjoyed having this as a dessert during tea break.

Sunday, November 2, 2008

Asparagus Cream Soup

Long time ago, I coaxed my boyfriend and pleaded him to let me buy a blender. I promised to blend us various fruit juices and also to cook him asparagus cream soup as a reward. It is already almost 2 years since I acquired the blender of which it is kept in the cabinet, not frequently used and not even cook the asparagus soup a single time!

Today, I get a request from him to cook the asparagus cream soup out of a sudden when we were shopping at the vegetable stalls. It should be the various stalks of asparagus lying at the stalls that captured his attention. He remembered the promise I made!

I've tried quite a number of times cooking this soup a few years back at home but it was really not much appreciated by my family. Hence, it did made me hesitated for a while whether to comply and fulfill his wish. In the end, I decided to accept the challenge and grab a bunch of asparagus from the stall. He was pleased!

I managed to searched a few of recipes available online and decided on this recipe from this site. It is a clear step by step recipe in video format. It requires quite a number of steps like preparing the stock for the soup base, blending, stir fry and simmering, I am thankful that it is not difficult to follow the video recipe.


Outcome:

Overall, it tasted very good, though it was not as thick and as creamy as it should be. That was definitely my fault as I added more water half way through boiling the stock as I thought the portion might not be enough for the 2 of us. Besides, I also reduced the amount of cream that the recipe called for. Nevertheless, if follow strictly to the original recipe and with sufficient salt added to this soup, could almost match the standards of asparagus soup sold in Ikea! That was how we fell in love with asparagus soup when we tried this soup at Ikea a few years back.

Vegetable Pizza

I am making pizza again! Yup! This is my 2nd attempt of making pizza just after last week's failed thick pizza crust. I am hoping to succeed in making a thinner crust pizza. Besides the crust, I also would like to incorporate some vegetables as toppings so it is much more healthy.

This week, I am going to follow the ingredients from a recipe book called "The Easy Way to Artisan Breads & Pastries" which I borrowed from the library 2 weeks ago to make the dough. For those who does not own a bread maker, this is a good book as it teaches you how to use a stand electric mixer to knead the dough instead of kneading it on your own. It contains various colourful illustrations and the steps are so well described, you will not have difficulties understanding them. I am using a bread maker to make the pizza dough.

For the pizza recipe in this book, it also offers a no-cook pizza tomato sauce to go with the pizza dough, though I just used the pizza sauce I bought a week ago from the hypermarket. I guess I will try out the pizza sauce from this recipe book the next time I make pizza again, may be next week :)

As usual, I am reducing the quantity that the original recipe by halve to suit for 2 persons.


Ingredients:
(yields 1 30cm pizza)

1/4 cup cold milk
1/4 cup water
1/2 tbs extra-virgin olive oil (I used pure olive oil)
1 1/2 cup bread flour
1 tbs sugar
1 tsp salt
1 tsp dry yeast
Extra olive oil (greasing the baking pan & for the crust before baking)

Toppings:

70 g Pizza sauce (I used Ardmona Pizza sauce)
1/2 Capsicum (Sliced thinly)
4 buttons Shiitake mushroom (Sliced thinly, stalk removed)
1/2 head onion (Sliced thinly)
Grated Mozzarella Cheese (I used Perfect Italiano Pizza Plus)

Method:

1. Pour in the ingredients except salt into the standing electric mixer bowl with the dough hook attached. Mix under low speed for 5 minutes. Add salt and switch to medium speed for additional 10 minutes. Let rise in a floured bowl and covered with cling wrap/ wet cloth for 1 hour.

OR

Dump in the ingredients according to the list above into the bread maker, select the 'Dough' function and wait until the kneading & rising cycle completes.

2. Once complete rising, transfer the dough onto a floured flat surface and give a light kneading to remove the gas from the dough. Let it rise, uncovered for 10 minutes.

3. Preheat oven at 200 degree Celsius.

4. Press the dough into greased, 30 cm pizza pan. I had my baking tray lined with aluminium foil. Try to stretch the dough outwards. Alternatively, you could use a floured rolling pin and roll the dough into 1/8 inch-thick pizza dough.

5. Brush the crust with olive oil.

6. Immediately, spoon pizza sauce over dough, top with cheese and toppings.

7. Bake for 25-30 minutes or until cheese is bubbly and crust is golden brown.

Ingredients and partial recipe is adapted from "The Easy Way to Artisan Breads & Pastries"


Outcome:


It is very successful this time! Everything tasted perfectly and I even get a remark that it is almost similar to Pizza Hut's standard! Though, I still failed at achieving the thin crust standard like Spizza or Sarpinos Pizza, we are more than satisfied with the outcome this time around. When we munched the side of the pizza, to our delight, it is crunchy and crispy! Very, very delicious! I would definitely make pizza using this dough recipe again and again until I found a better one!