Tuesday, June 19, 2012

Santouka

Although I am a proclaimed Ramen lover, I always thought the best Ramen is only found in Japan. That was after my business trip to Japan few years back. Back then, I had Ramen almost everyday, every meal for 10 days. I've gotta admit. I was a bit too conservative, always sticked to the same food I liked and not adventurous/ bothered enough to look for the hidden gems in Singapore.

Well, I've met a few true Ramen lovers recently. They've opened my eyes and let me explore into the world of Ramen. Most of the Ramen lovers would tell you restaurants like Ippudo, Santouka & Marutama offer good Ramen. True enough, when I checked them out, these are reputable Ramen shops in Singapore. I've only tried Marutama but I have not tried the other 2.

My first at Santouka was at the Cuppage Terrace. I checked some forums and got to know their Shoyu and Miso Ramen with pork cheek is recommended. Hence, without any hesitation, I ordered Miso Ramen with pork cheek and added a Hanjuku Egg :)

It was served this way:


The pork cheek was soft and tender, the soup was thick and rich in flavour and the noodle was springy. Love it, love it, love it! The picture speaks for its yummi-ness. I gulped down the whole bowl and almost finished the soup too with joy and 100% satisfaction!


Ash's Rating: 9 out of 10

Location: 21 Cuppage Road, Cuppage Terrace, Singapore

Tel: +65 6235 1059
Mon–Fri: 12 pm–3 pm, 5.30 pm–12 am
Sat: 12pm–12 am
Sun & PH: 12 pm–9.30pm


Monday, June 18, 2012

Kki Again

A farewell lunch for a colleague brought us a sweet ending at Kki. After a very disappointing lunch at Lerk Thai (Tanjong Pagar Mrt), we wanted a good dessert to compensate the bad service and food. I suggested Kki and managed to persuade them. We walked all the way to this little delightful cafe from Tanjong Pagar MRT.

May be it's weekday or it's still lunch time (about 1 pm). The seats were of abundance and it's not as busy compared to weekends. 

We ordered 3 cakes: Mont Blanc, Kinabaru and Antoinette to share between the 5 of us. Finally, Mont Blanc is available! Yippee! For Ash's Rating and location, please refer to my previous entry, Kki

Here are the pics I've taken. All of them taste as lovely as they look:

Mont Blanc


- French Chestnut Paste with Fresh Cream.
- This is always sold out.
- Only managed to try this after the 3rd visit to Kki.
- Very chestnut-ty in flavour, me and my colleague like it very much

Attoinette


- White Chocolate mousse with Mango.
- Simple with a note of fruity mango flavor.
- Light, yet sophisticated in taste

Kinabaru


- Coconut mousse with Passionfruit.
- Special and delightful
- Will perk you up on a gloomy day :)

I love this place. Overall, my colleagues especially the girls like the uniqueness of the cakes and the ambience at Kki. For the guys, they complained about the price. Sorry, guys...beauty and quality do come with a price :)

Wednesday, June 13, 2012

Easy & Yummy Oatmeal

Once in a while, I would have oatmeal as a quickmeal for either breakfast or late dinner. I used to only add 3-4 table spoonfuls of oatmeal into hot water and soaked for about 5-10 min. It is low in fat and very health beneficial. In most occasions, I just want an easy and quick meal, though I need to admit the taste is bland.

Note: Oatmeal has been known to lower blood cholestrol due to its soluble fibre content and reduce heart diseases. Not sure how true this is because I still have high cholestrol eventhough i take 1 spoonful of oatmeal almost everyday.

Recently, I discovered oatmeal can be versatile and delicious. It is bland and boring by its own but when you add combination of nuts, dried fruits, cereal mix, herbs & etc, it can turn into some stomach warming and one of its kind meal. It just takes one to be adventurous to appreciate and enjoy it.

I started experimenting oatmeal cereals with toppings. The following are some combinations of the ingredients with the oatmeal which I find nice and worth keeping.

Ingredients:
yields a cup (200-250 ml)

200 - 250 ml Hot Water
3 - 4 tbs Instant Oatmeal (Quarker)
any of the toppings stated below

Toppings:

A)
1 tbs Goji Berries (must be from Eu Yan Sang)
2 tbs Meat Floss (can be of any brand, be it crispy or not)


B)
1-2 tbs Dried Cranberries & Nuts

C)
1 pkt Nesvita (3 in 1 cereal)

D)
1 pkt Herbalife Chicken Soup (powder)
2 - 3 tbs frozen corn (blanched)
bread crumbs (optional)
spring onion (optional)

E)
any 3 in 1 cereal mix
1 tbs Goji Berries (Eu Yan Sang)


The above ingredients are easy to get and the meal is very easy to prepare. Try it and who knows, you might start loving oatmeal as much as I do. :)

Monday, June 11, 2012

Kong Kee Seafood Restaurant


I first saw Kong Kee KL Fried Hokkien Mee advertisment on a cab 3 months back. It attracted my attention because it used to be one of my favourite food in Malaysia. This is a kind of forgotten goody food. Firstly, it's very fattening and not healthy. Being the health concious me, fried food is mostly avoided unless it is something that will give me YUMS factor. Secondly, I have tried a few stalls of fried fat noodles in Singapore (all claimed to be KL version), none was able to satisfy me.

Anyway, we went to Kong Kee Seafood restaurant yesterday. Don't ask me why it took so long but boy, I am glad we went there. Though the Fried Hokkien Mee was still not as good as the ones in KL, at least the taste was quite close. We prefer the fried pork lard to be crunchier and the noodle more springy. The texture of the noodle was a bit too soggy for my taste. For 5.00 bucks a plate, I think it is worth the price.

Apparently, for Kong Kee, aside from their famous KL Fried Hokkien Mee, they are also famous for their garoupa dishes. You can hardly miss ordering one of these since they posted and boasted about the garoupa dishes all over the wall in the restaurant. They have lots of varieties of dishes for Garoupa from steaming, stir frying to frying for almost every part of the fish: fish head, bones, fish belly, fish meat, the whole fish & etc. We just ordered the one they promote on the wall, "Black Bean Paste Garoupa Fish Head with Bittergourd".

The distinctive and special taste of this dish blew us away and earned a "WOW". The Garoupa fish head was fried until crunchy in bite size and later stir fried with their special black bean sauce and bittergourd. Although we have to pay a hefty 28.00 bucks for a small serving, we loved it so much and think it is quite worth paying. We are definitely going to have it again in the future :) and try out their other dishes.

Ash's Rating: 
6 out of 10 for Fried Hokkien Noodle
8.5 out of 10 for Black Bean Paste Garoupa Fish Head with Bittergourd.

Location: 611 Geylang Road (Lorong 31), 389550 Singapore

Tel: +65 6443 8221
Daily: 11:00 - 2:00 am


Sunday, June 10, 2012

Kki

I've heard about Kki a while ago. It is a small pattiserie located along Ann Siang Hill which offers delicate fine Japanese pastries. The first time we went there, the crowd was full but I did not get a chance to taste their cakes as they were all sold out. It was just 3 plus pm on a Sunday afternoon.

Yesterday, we tried our luck again and went there after our lunch. I got to know they are famous for their signature cake, the "Mont Blanc". This time round, it was as crowded as we last visited. Although the cakes were not sold out, Mont Blanc was no where to be seen. A disappointed me was told the cake was in fact sold out and we were recommended to call and reserve.

Nevertheless, the news did not dampen my mood. The adventurous us decided to try their Tiramisu to go with Cappucino and Latte.

Tiramisu

The cake was light, fluffy, and sweet with a hint of coffee in the middle, just like how most of the Japanese pastries would look and taste like.


As for the cappuccino, it was served in a clear glass instead of the usual porcelain cup. Their cappuccino is made using Nespresso coffee. I found it more milk-based with a subtle hint of coffee.

Cappuccino

With delectable cakes & light coffee coupled with cozy ambience, lovely services and a good company, Kki is now one of my best choices for tea breaks. I wish they have more space and tables for the crowd.

My verdict? I would definitely visit Kki again during weekends and when my cravings for sweet, light pastries set in!

Ash's Rating: 8/ 10

Location: 7 Ann Siang Hill, S069791
Tel: +65 6225 6650
Tue - Sat: 12:00 - 7:00 pm
Sun: 1:00 - 7:00 pm
Mon: Closed

Friday, June 1, 2012

Drunken Prawn Soup

While I was shopping for groceries at NTUC Finest, I came across some very big, fresh prawns. Prawn is not one of my favourites but I could not resist the temptations. I had no idea how I would cook them but I bought them anyway. Be it steam, stir fry, boil, fry...I am sure there would a way to deal with them later :)

This is the first time I cook prawns. Ok, I know little of how to cook them. One thing I do know is the cooking time is short, roughly 5 minutes. Good thing is, there is always internet to help me out! :)

I searched and found one interesting recipe, "Drunken Prawns Soup". Decided to give it a try. Well, never try never know...I am always adventurous when it comes to discovering something new. The following website is referenced but I did some tweaking to my taste.

Kuali.com

Ingredients:
(yields soup for 2 persons)

A)
6-7 big Prawns (trimmed with skin intact)


B)
2 tbsp Ginger (shredded)
1 Dried Scallop
3 slices Dang Gui ( 当归)
2 sticks Dang Shen (党参)
5-6 slices Pak Kei
2 tbsp Wolfberries
600ml water

C)
1 tbsp sugar
½ tbsp light soy sauce
½ tbsp oyster sauce
Salt to taste
1 tsp sesame oil
¼ tsp pepper
3/4 tbsp water

D)
1/3 cup Rice Wine
Salt to taste

E)
Noodle (cooked and put aside) - Optional

Method

1) Boil ingredients B) for about an hour.


2) Add in seasoning C) & A) and cook for about 3-5 minutes.

3) Add in D) and boil for another 30 sec.

4) Scoop the soup and pour over Noodle.

Results


Yummi-licious!!! We had great fun cooking in the kitchen. The aroma from the herbs was fragrant. The soup was flavourful and invigorating. We had a very satisfied, sumptuous meal! Burrrrpppp~


Wednesday, May 30, 2012

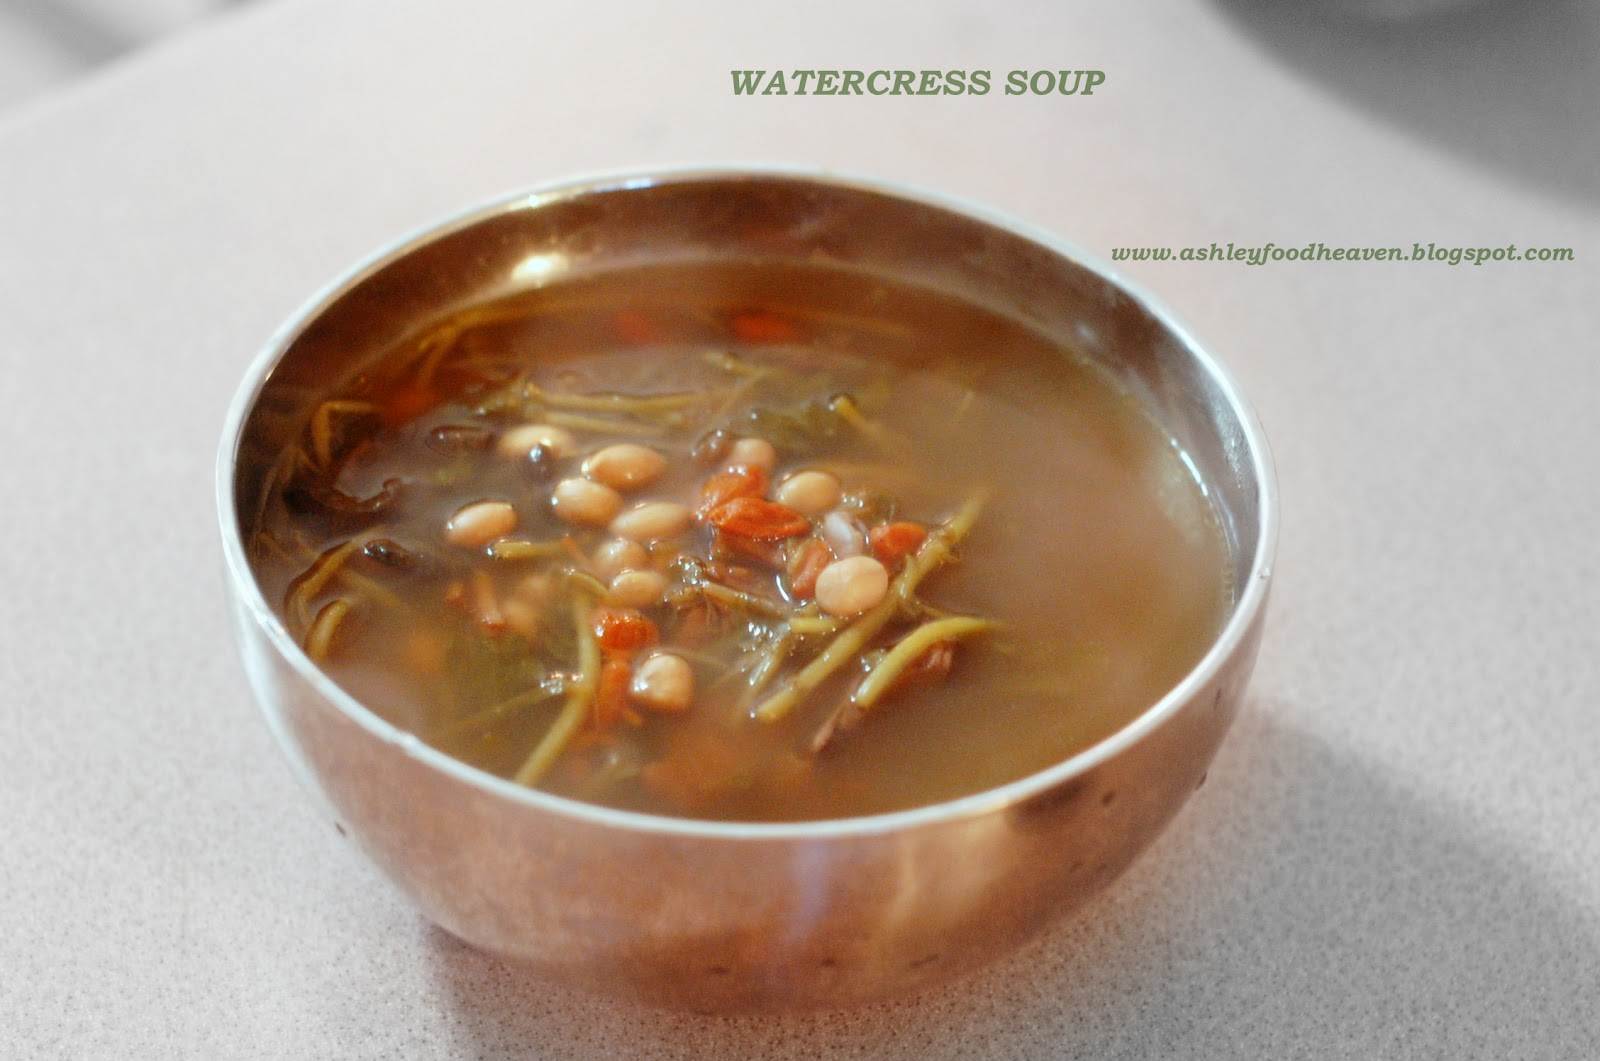
Watercress Soup

It's Sunday and drizzling outside. My fav day and weather....arrrh....so comfortable and cozy. Decided to just stay in, rest and have some home cooked meals. :)

Today, I'm going to try Watercress Soup. Not sure I've gotten bad vege or I did not put the right ingredients or simply my cooking skill sucks. This is at least my 3rd attempt over the past few years. The last time I cooked it, I totally gave up. The soup turned out bitter and I had to pour most of it away! What a waste!

I was reminded a lot of times by my mum that the watercress need to be put in boiling water and not cold water. I thought I followed her instructions well but I still failed....may be I am a bad student too...hahahah

Health Benefits
- Cooling
- Lung cleansing and suitable for smokers

Ingredients
(yields 1.8L)

1.8 ltr of Water
250g Pork Ribs
A grip of Wolfberries
4-6 Red Dates
100g Raw Peanuts
A bunch of Watercress

Method:

1) Pre-soak raw peanuts for at least 2 hours.

2) Soak Watercress in salt water for about 15 mins, remove roots and cut in half.

3) Blanch the pork ribs with boiling water for about 5 mins to reduce most of the scums.

4) Put all ingredients EXCEPT Watercress in a pot of water bring it to boil.

5) When water comes to a boil, put the Watercress in and simmer for at least 2 hours.


Results:
Nice and satisfying. I finally got it right! Thanks, Ma! Finished the whole pot of the soup in a day. :)


Monday, May 7, 2012

Claypot Chicken Rice using Rice Cooker

Claypot Chicken Rice originates from Southern China region, and later spread to countries like HongKong, Singapore and Malaysia. I call it "One Pot Wonder" as it is packed with lots of ingredients cooked in a pot. Normally, the rice is cooked first and the prepared ingredients added 10-15 minutes later.

One of my all time favourite meals, I recreated my own version of Claypot Chicken Rice using rice cooker.

Ingredients
(serves 2-3 person)

1.5 cup of Raw Rice
1/4 pc Chicken (cut into bite size)
1 pc Chinese Sausage
5 pcs Chinese Mushroom
5 cm Salted Fish (baked/ fried to crisp) + 1 teaspoon of sugar

Garnishing
Spring onion (chopped) - Optional

Chicken Marinade
3 tbs ginger (chopped)
1/4 tsp Dark Soya Sauce
1 tbs Oyster Sauce
1/4 tsp Ground White Pepper
1 tsp Sesame Oil
1/2 tsp Corn Flour
1 tbs Shao Xing Wine
Pinch of salt
Pinch of sugar

Drizzling Sauce
1 tbs Oyster Sauce
1/2 tbs Dark Soya Sauce
1 tbs Soya Sauce
1 tsp Sesame Oil
1 tbs Shao Xing Wine

Method

1. Marinade the chicken in a bowl for at least 2 hours.

2. Soak the mushroom in hot water for about 30 minutes. Squeeze and drain the mushrooms. Remove the stem and dice in cube, biting size. Put aside.

3. Soak the Chinese Sausage in hot water for 5 minutes. Slice horizontally and put aside.

4. Cook the rice as per normal in a rice cooker.

5. 20 minutes prior to rice cooked, put in all the ingredients except Salty Fish.

6. Once rice is cooked, mix in the drizzling sauce and toss.

7.  Garnish with Salted Fish and Spring Onion.

Results

The aroma from the rice cooker is very fragrant and I waited with much anticipation. It turned out to be as good as it smells. Simply mouthwatering, delicious and satisfying! This is definitely a keeper!

Wednesday, May 2, 2012

Lotus Root with Peanut Soup

As I'm writing this in my room, I can smell the aroma of the soup from the kitchen. The soup has been simmering for the last 1.5 hours. Almost there~ :)

I know I have been MIA for a LONG~~ time. Thanks to the encouragements from my friends, I decided to write again while practicing my cooking skills. For a start, I am cooking the Lotus Root with Peanut Soup to go with Rice Cooker Chicken Rice. For a soup lover like me, I will not classify having a complete meal without a soup.

Ingredients:
(yields 1.8 litre)

1.8 litres of water
400g Lotus Root
200g Pork Ribs
100g Raw Peanuts (pre-soaked for at least 2 hours)
4-6 Red dates (pitted)
2 Dried Scallops (Optional)


Seasoning:
Salt/ Soya Sauce (as desired)

Method:

1. Peel the skin of Lotus Root and cut into 1 cm thick slices.

2. Blanch or boil the Pork Ribs in a pot of water for few minutes to remove the debris and smell.
(This is very important to yield a clear soup later)


3. Rinse the Pork Ribs and set aside.

4. Put in Dried Scallops and Peanuts into a pot of water and bring to boil.
(Important note: Peanuts must be put in the pot prior to boiling to get soft peanuts)

5. Put in the remaining ingredients and simmer for 3 hours.

Results:


The peanuts and the lotus roots are soft, just the way I like them. Thirst quenching and satisfying - yums! Just like how my mom cooks it.

Sunday, May 16, 2010

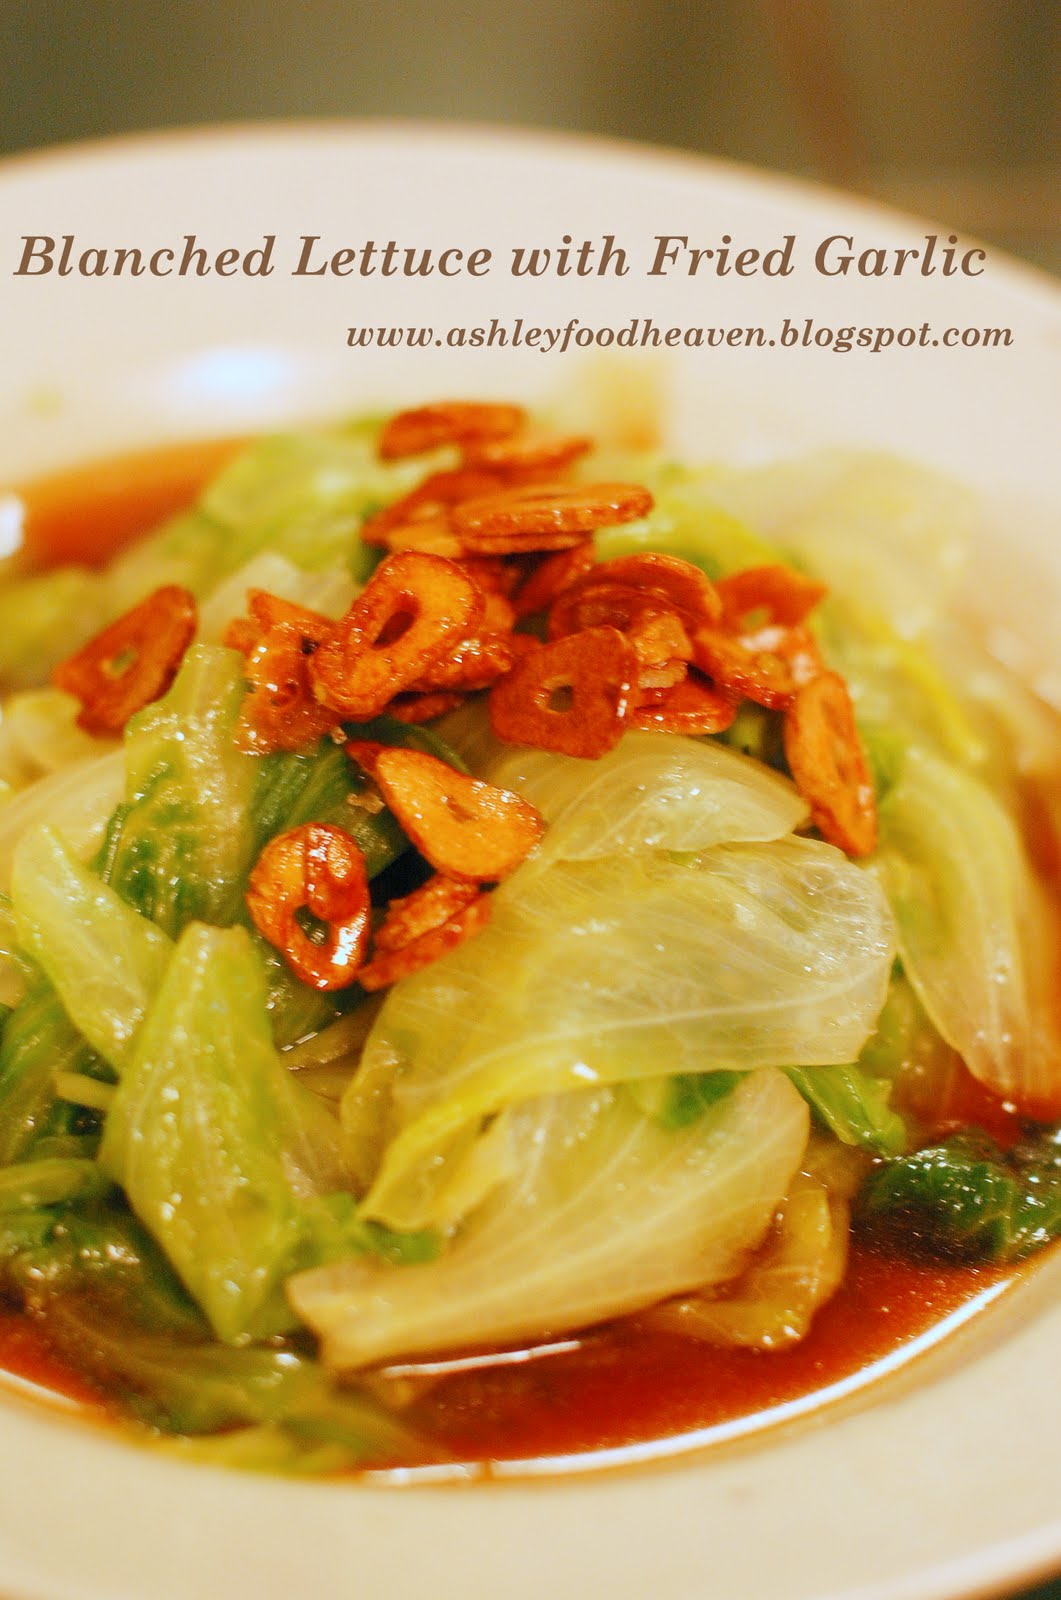
Blanched Lettuce with Fried Garlic

I love cooking simple, non-messy dishes. Blanching vegetable and then dressing them with the right amount of oyster sauce, soya sauce, sugar & white pepper can create a simple, delicious and healthy dish. (At least, it is healthier than stir frying, that is what I think)

Other than lettuce, this recipe also works well for other green leafy vegetables like Chye Sim, Tong Ho (Garland Chrysanthemum) & etc). Normally, blanched vegetable is garnished with fried onion instead of fried garlic. However, I love both types of garnishing.


Ingredients
(yields 1 plate for 2-3 persons)

1 Head Iceberg Lettuce (washed & cut, 2 inch length)
5-6 Cloves Garlic (sliced thinly)
2-3 tbsp Oyster Sauce
1 tsp Soya Sauce
1/2 tsp Sugar
1-2 dash White Pepper Powder
Sufficient Oil (to fry the garlic)


Method

1. Heat up sufficient amount of oil in the wok.

2. Under medium heat, fry the garlic until golden.
(Note: To retain the crisp of the garlic, put a dash of sugar right at the end of frying before reserving the oil)

4. Reserve the garlic and oil and put aside until further use.

5. Pour 1-2 litre of water into the wok and boil. It is ok with some oil remained in the wok.

6. Once water is boiling, dump in the vegetable and blanch for about 3-5 minutes.

7. While blanching the vegetable, mix the remaining ingredients with 1 tbsp of the garlic oil in a clean plate.

8. Strain the vegetable, put into the plate with sauce and mix thoroughly.

9. Garnish top of the vegetable with fried garlic and serve.


Results:

Easy and delicious. :)

Monday, May 10, 2010

Sambal Lady Fingers

In Singapore, sambal lady fingers is a common dish at the Mixed Rice stalls. I, myself, like to order this dish but have never tried cooking this. I thought it is time for me to venture a new recipe other than the normal, non-spicy stir fried version.

As I have not much experience in sambal, I started looking for a recipe at the websites. What can be as fast and convenient as the Internet to get information? :)

I came across a few interesting websites and decided to copy a bit here and there and also made a few moderations in the ingredients' quantity as well as seasoning amount.


Ingredients
(yields a plateful for 2-3 persons)

10-12 stalks Okras/ Lady Fingers (diagonally sliced)
1 Red Chili (julienned)
3 tbsp Cooking Oil
Sambal/ Chili Paste ingredients
6 Red Chili (Deseeded)
3-4 Dried Chili (Soaked & Deseeded)
3-4 Bird's Eye Chili (Deseeded) - Optional
1 inch Belacan/ Dried Shrimp Paste (Toasted)
1 small grip Dried Shrimp (Soaked for about 15 min)
6 Shallots (Peeled)
3 cloves Garlic (Peeled)
2 tsp soya sauce
1/2 tsp sugar
Method:
1. Blend all Sambal ingredients and set aside.
2. Heat up wok and pour in oil.
3. Once wok is heated, add sambal/ chili paste and fry for about 5 minutes or until fragrant.
4. Add the lady fingers and fry for another 5-10 minutes.
5. Add some water if more sauce preferred. Add seasoning (salt, sugar, soya sauce) suiting to own preference.
Note: Taste the sauce & also the lady fingers!
6. Add julienned Chili last and stir fry a few more moments before dish up.
Results
Yummy! Satisfying and definitely a keeper for me!

Saturday, May 8, 2010

Black Dace Tofu

Tofu is one of my favourite dishes. It is high in protein and nutritious. On its own, it tastes bland; but when cooked with the right sauce, it can be turned into something delicious.

Last year, I learnt a great tofu dish from my ex-housemate. It is simple to cook, with simple ingredients, yet yuuuuummmmy! It is my all time favourite and I introduced this to my family and they liked it too.


Ingredients
(yields 1 plate for 2-3 persons)
2 blocks Pressed Tofu (suitable for frying, cut in 1 inch/pc)
2-3 stalks Scalion (cut into 1 inch long)
1 Red Chili (Deseeded & Julienned)
2-3 Red Bird's Eyes Chili (Deseeded & Julienned) - Optional
3-4 cloves Garlic (chopped)


Sauce

1 tbsp Cooking Oil
2-3 tbsp "Organic Forest" Black Dace
1 tsp soya sauce
1 tsp sugar
some water

Method

1) Heat up sufficient oil and fry cut tofu until golden brown. Do not over fry or the tofu become too crispy.
2) Put fried tofu aside and reserve about 1 tbsp of oil in the wok.

3) Saute garlic and chili for about 1 minute when oil is heated.

4) Add the black dace and saute for about another 1 minute or until fragrant.

5) Pour water and the remaining sauce ingredients and continue cooking for another 1-2 minutes.

6) Add fried tofu and scallion and stir fry just to ensure all tofu covered with the sauce.

5) Dish up and serve.


Results
I've cooked this a couple of times and every time I get the thumbs up. I think the black dace from "Organic Forest" is the key to the success of this dish! If I am using other brands, I need to tweak on the amount of water, sugar and also a bit of "Hsao Shing Wine" right at the end to make it more flavourful. The other key is to always taste the food before dishing up. :)

Wednesday, April 7, 2010

Stir Fried Lady Fingers with Dried Shrimp

This is the 2nd time I attempted stir-frying lady fingers and I still find it simple to prepare and cook. I do not know when I started to like lady finger as I used to hate the slimey portion within it when you stir fry them. May be it is due to the change of taste buds thoughout the years.

I followed the recipe from Hochiak! Delicious Asian Kitchen. It is easy to understand and follow the steps.
I am certainly going to try out more of the dishes from this link.

Tuesday, April 6, 2010

Thunder Tea Rice

Thunder Tea Rice is originated from Hakka. It is one of my all time favourite meal. Not only it does not contain meat (except for the dried shrimp and fried anchovies), it is a very healthy. The rice (white rice/ brown rice) is normally topped with cubed & diced cooked long beans, tofu, cabbages, vegetables, dried shrimp, fried anchovies (ikan bilis) and peanuts. It also comes with a soup which is made from blended nuts, basil & mint leaves. The soup is normally poured into the rice and is mixed. Once mixed, you can indulge the rich taste and flavorful meal. Some people also enjoy taking the soup separately but there is no fix rule to enjoy the Thunder Tea Rice.
The tofu and fried basil omelette comes in a set with the rice with the top up of extra SGD 2.00. It goes well with the rice, hence, I usually go for it.

Thunder Tea Rice is not commonly found in Singapore. Probably it is due to the amount of work to prepare the soup and the ingredients. Once in a while, I enjoy a bowl of thunder tea rice at Food Republic ,VivoCity. The ambience at Food Republic reminds me of the 1950's hawker stalls with wooden chairs and tables. The ceiling is well decorated with red & bamboo lanterns. The walls are decorated with paintings and ornaments which suit the 50s theme. In the background, you can also hear some of the Chinese oldies being broadcasted.
Due to its uniqueness comparing to other hawker centres or food courts around Singapore, no wonder Food Republic is always crowded with people during peak hours.
Since VivoCity is quite near to where I work, I lunch quite often at Food Republic. Today, I ate Thunder Tea Rice and thought of capturing a few snapshots of the food court to be used here. All the photos shown in this page are randomly taken with my iPhone. I am glad the photos turned out OK. I am even happier I had my stomach and cravings fulfilled.

Monday, April 5, 2010

Steamed Sweet Corns

I was not really a big fan of corns as I thought the taste was a bit too bland for me and sometimes it took me forever to nimble and finish the whole cob of corn. However, I changed my thoughts about corns one day after I tasted the sweetest and the juiciest corn steamed by my mum. Those corns were bought from Cameron Highlands a day earlier. The flesh tasted sweet even when they were uncooked.

I have been staying in Singapore for almost 5 years now and I never really had a chance to buy Cameron Highlands' corns. The ones I normally stumbled upon were either from local Malaysia farm, Thailand or Indonesia. We bought these before but the taste of these corns were never the same.

One fine day about 3 weeks back, we came across a stall which sell the Cameron Highlands' corns in the local wet market. Eventhough they only had 3-4 cobs in the stall, we grabbed everything from them and ever since have been visiting the stall every Sunday morning.
The simplest yet the best way of eating the corns is simply by steaming or boiling them in very hot water for a few minutes.


Ingredients:
(yields 2-3 cob of corns)

2-3 Cob of Corns
2-3 litre Water
2-3 tsp Salt

Toppings (Optional):
Butter (as desired)
Salt (Sprinkle as desired)


Method:

1) Add salt to the water and pour into a wok/ pot. Cover with lid.

2) Bring the water to boiling point.

3) Put the cobs (the leaves & husks still intact) after washing into the boiling water and boil for about 12-13 minutes.

4) Take the corns out and peel away the leaves & husks.

5) Slab a fair amount of butter as desired and sprinkle some salt on the corns.

Results:
Simple & no mess yet filling, satisfying & yummy. I even tried them without the toppings and they still tasted good. Life can be as simple as this. I finished the whole cob within 5 minutes! Yummy.

Sunday, April 4, 2010

Dinner at Annalakshmi

I dined out tonight at an Indian vegetarian restaurant and I think I should blog and promote this restaurant. Annalakshmi is the culinary arts section of Temple of Fine Arts (TFA), an artistic and cultural organization dedicated to serving the society through arts, music and dance. It is a non-profit restaurant whereby it serves donors with traditional Indian food, buffet style while payments/ donations from donors go to the needy. The donor only needs to pay from his/her heart for the meal.

No kidding, but you have to make a reservation to have a meal in this restaurant. Luckily, reservation was made ahead of our dinner. The entrance is lavished with heavy but beautifully crafted wooden door. The internal is lighted in a comfortable ambience and it is decorated with a lot of crafted figurines & paintings. Halfway through my meal, I realized that some of these figurines and paintings are tagged with price tags. I believe these are for sale and the earnings will go to the foundation for the needy as well.

I have always heard about this restaurant but this is the first time I've tried it. They are located at the basement level in Chinatown Point and there is one at Amoy Street. Although it is for charity, this restaurant is serious in offering good food too. It is a pity I only know the names of few dishes which I liked so much. Papadum (Crispy crackers), Orange Lassi (Yoghurt drink) and one of the sweet desserts with mini sago were very nice and earned a thumb up. The Lassi is not available at the buffet table but you can order it from the waiters.
The following is a photo of what I'd taken for dinner and I had it refilled!

We had a great time catching up. I truly enjoyed the meal and most important of all, helping the needy at the same time. Nothing could lift my mood as much as this!

I urge to those who read and seen this blog to visit and be a generous donor while having a good hearty meal at Annalakshmi. The website and phone number are stated in the first photo in case you want to make a reservation for a meal there!

Buns for the weekend

I am back again after a long MIA! I feel that I have to start baking and blogging again so that I can spend my weekends more meaningfully rather than watching tv and playing iPhone games for hours!

I came across some photos of my cousin's baked buns when I was browsing Facebook. The photos inspired me to do it again. So, I started looking for the ingredients that I still have in the cabinets and planned what I need to bake. It was a shame the bread flour had turned bad (with bugs in it!) and I had to throw it away. Luckily there is a "Shop & Save" across the street from where I stay. I went out and grabbed whatever I needed, headed home and started to prepare the ingredients for the buns. I was too excited to start again!

For a change, I decided to knead the dough with my hands instead of using the bread machine. Though I lacked experiences of kneading the dough manually, I knead it for about 30 minutes. Unlike my past experience where the dough just stuck awfully to the table and I had to helplessly scraped it off the table with a knife, I knead the dough in a big plastic bowl. I managed the dough this time without any problem. A good sign for a start!


Ingredients:
(yields 6 buns)

150g Bread Flour
50g Top Flour for HK buns
20g Caster Sugar
1/4 tsp Salt
1/2 tsp Instant Yeast
130g Milk (I used fresh milk)
20g Unsalted Butter

Filling (Can be any fillings):
for Cheesy Garlic buns

30g Butter (soften at room temperature)
2 tbs Chopped Garlic
1 tsp Dried Parsley Flakes
2 tbs Shreded Cheddar Cheese (Optional)

for Hotdogs

6 hotdogs (room temperature)


Method:

1. Put all dry ingredients into a big bowl.

2. Slowly pour and mix the milk into the dry ingredients. Add butter last.

3. Knead the dough for about 30 minutes until it is no longer sticky. Perform the window pane test if necessary.

4. Take out the dough and oil the bowl.

5. Put the dough back into the bowl and cover it with a moist cloth or cling wrap.

6. Let the dough rest for 1.5 hours or until it has risen to double of its original shape.

7. Take out the dough and slightly knead on a lightly floured surface to release the gas.

8. Cut the dough into 6 equal portions and put them back into the bowl covered with moist cloth or cling wrap for about 15-20 minutes.

9.

for Cheesy Garlic Bun
a. Slightly flaten the dough into a round disc.
b. Roll up Swiss roll style, pinch the seams in place & shape it into torpedo shape.

for Hotdog
a. Slightly flaten the dough into long 1.5 inch wide strip.
b. Wrap a piece of dough in circular motion to a hotdog.

10. Place doughs seams side down onto the baking tray lined with aluminium foil or parchment paper.

11. Loosely cover with moist cloth or cling wrap for about 30-45 minutes or until it has risen doubly from original size.

12. Preheat oven to 180 deg C.

13. After the dough is ready, brush them with egg wash.

14. For cheesy garlic buns, while waiting for the dough to rise, prepare the filling by mixing them together.

15. Cut a deep slit into the middle of each dough.

16. Pipe in the filings.

17. Bake the buns for about 15-17 minutes. For the last 5 minutes, I moved the tray to the top portion in the oven.

18. Once baked, take out the buns and air them on a rack until cool.
Results:

The buns turned out soft and nice. Hotdogs turned out to be the best in terms of the texture. I am definitely going to make more of these in near future!

Thursday, July 16, 2009

Raisin Muffins


I am in the mood of baking~I choose muffins today because it is easy, fastest and less messy. It only takes around 1 hour from preparation to baking these muffins. I have all the ingredients required and most important of all, I really feel like baking for everyone. :) I am in a very happy mood today and getting very excited as tomorrow I will be going back to my hometown in Malaysia. I just got to bake to release some of my excitement!

Hmm...I think I baked Raisin muffins before but the other version did not yield me a very very satisfying results. May be it is because I do not really like cinnamon and nutmeg which is in the recipe.

This time around, the ingredients are very simple and the steps are even more simpler. Nutmeg and Cinamon is not used too:


Ingredients:
(yields 12 muffins)

1 3/4 Cup Self Raising Flour
1/4 Cup Sugar
1/2 tsp Salt
3/4 Cup Raisins
1 Cup Milk
1 Large Egg
1/4 Cup Butter (melted)
1/2 tsp Vanilla Essence


Method:

1. Preheat the oven at 200 degree Celsius.

2. Grease the muffin moulds or use paper cups to line the muffin tins. This way, you will not get the crust on the sides but cleaning will be easier.

3. Mix all dry ingredients in a bowl.

4. Lightly beat the egg in a bowl. Mix with other wet ingredients.

5. Pour the wet ingredients (beaten egg, vanilla essence, milk & butter) into the dry ingredients.

6. Stir lightly a few times until combined. Do not overmix. Lumps are ok in the batter. If the batter is too dry, add a few tablespoons of milk.

7. Scoop the batter into the cups.

8. Bake for 18 - 20 minutes.

9. Leave on the rack to cool down for 2-3 minutes before unmould if tin is not lined with paper cups.


Results:

The smell of the muffins are really good. Vanilla Essence is very important too add some fragrance to these muffins! Well, it is great and I had it in the morning as breakfast!